


You recorded the breakdown right after the final whistle. Hot takes on the offensive line, a rant about clock management, a couple of genuinely funny bits. Then you listen back and... it sounds like the whole thing was taped in a bathroom. Listeners will forgive a bad prediction about the AFC North. Boomy, hollow audio? They'll bail before minute two.

Charles LeClaire / Imagn Images
Baltimore Ravens kicker Tyler Loop holds his hands on his head after missing what would have been a game-winning field goal to beat the Steelers and win the AFC North in the final NFL regular-season game of the 2025 campaign.
Before you blame the mic, look at the walls: bare drywall bounces every word back at you, and a handful of studio soundproofing panels placed in the right spots does more for a fan show than a gear upgrade. What the microphone actually hears is your voice plus a dozen copies of it arriving a few milliseconds late from the ceiling, the desk, the window. That smear is the "home recording" sound everybody recognizes instantly.
This guide walks through the setup in the order it matters: choosing a room, picking gear that won't fight you, treating the space, handling more than one host, and dealing with a house that gets loud every Sunday.
Pick the Right Room Before Anything Else
The room shapes your sound more than any purchase. Small and cluttered usually beats big and empty. A spare bedroom with a bed, a bookshelf, and curtains already soaks up a fair amount of reflection on its own.
Some spots work against you from day one. A bare basement with concrete walls rings like a stairwell. A square, empty room builds up odd boomy tones right in the range of a male speaking voice. The worst choice on game day, honestly, is anything sharing a wall with the TV room, because you'll be fighting the crowd noise of your own family.
There's a reason so many podcasters started in a walk-in closet. Rows of hanging clothes swallow reflections, and the space is tiny. Not glamorous. Works, though, and it proves the point: soft, broken-up surfaces make voices sound close and clear.
Gear That Matters and Gear That Doesn't
Here's where people overspend. A pricey condenser microphone sounds amazing in a treated studio, yet in an untreated spare room it picks up everything, including each reflection off the walls.
Dynamic microphones are the usual pick for home shows. They're less sensitive, so they mostly hear the voice right in front of them and much less of the room. Get one per host, each on its own arm or stand, so nobody shares a mic or leans across the table.
Headphones for every host are non-negotiable. Without them people drift away from the mic, talk over each other and never notice the echo until editing. A basic audio interface with enough inputs for your crew does the job; fancy preamps can wait.
Stuff that matters less than forums suggest: expensive cables, a big mixing desk, ring lights before the audio is sorted. Get the sound right first. Viewers tolerate a so-so picture far longer than muddy audio.
Treating the Room So Your Voices Sound Clean
Panels go where your voice bounces back into the microphone. Spreading them evenly across every wall wastes money and leaves the important spots half-covered.
Behind and Beside the Hosts
Start with the wall your voice hits first, usually the one facing you across the mic, then the side walls at seated head height. Sit in your recording chair, talk, and picture the sound as a ball bouncing off flat surfaces toward the mic. Those landing points are where treatment belongs. Even a few panels placed there change a recording more than people expect.
The Ceiling Over the Table
Most hosts forget to look up. A flat ceiling a few feet above a table throws voice right back down into the mics, and a hard desktop helps it along. A panel or two directly above the recording table cleans up a lot of that, and a soft mat on the desk handles the rest.
Thickness and How Panels Look on Camera
For speech, one-inch panels cover most of the job, and two inches gives a little more range on deeper voices. Thicker panels, three or four inches, make sense in corners if your show uses intro music or you mix audio in the same room.
If the show goes out on YouTube, the panels become your backdrop. Fabric color and layout set the look of the set as much as any flag on the wall, so plan the arrangement around the camera angle. A neat row of dark panels behind the hosts reads as "studio." A random scatter reads as "basement," which, okay, maybe it is.
Recording Two or Three Hosts in One Room
Co-hosted shows bring their own headache. Each voice lands in every microphone, slightly late, and when you mix the tracks that leakage stacks into a hollow, phasey sound.
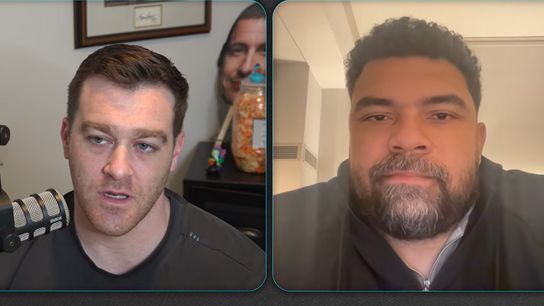
YouTube: Not Just Football with Cam Heyward
Spread the hosts out as much as the room allows and point each mic away from the others, ideally with people facing across the table at an angle instead of straight at each other. Keep every speaker close to their own mic so their voice dominates their track. A panel on a stand between positions blocks some of the direct spill and gives the room fewer hard surfaces to bounce from. Then, in editing, you can gate or lower each track when that person isn't talking. Much easier when the room isn't feeding every mic a copy of everyone.
When the Rest of the House Is Louder Than the Show
Game day brings its own soundtrack. An uncle yelling at the refs, kids, the dog losing its mind at the doorbell. Panels can't help with any of that. They tame echo inside your recording room; they won't stop sound coming in from the hallway. Keeping noise out is a separate job called sound isolation, and it works on doors, walls and gaps.
The door is usually where most outside noise sneaks in. A gap at the bottom lets sound through almost freely, so a door bottom seal plus perimeter seals make a real difference. Acoustical sealant around trim and outlets on shared walls closes the smaller leaks. And sometimes the simplest fix is scheduling: record the post-game show after the house calms down, or grab the room before kickoff.
Sound Pro Solutions, a Long Island City supplier, stocks both pieces of this puzzle: acoustic panels for studios plus door seals and acoustical sealants for the room you record in. They also offer acoustic advice by phone, handy if you can't tell whether your problem is echo or noise coming through the door.